
Moving to a Target Position
Here we have an autonomous mode for the robot that requires it to drive forward to a very specific position at the start of the match (into a small scoring area). This is a very common challenge in FRC games. In order to help with this, we have a distance sensor that you can read that will tell you how far you've traveled since the start of the match.
This will be one of the first challenges that require you to write a slightly more complicated command!
- Command:
src/main/java/competition/subsystems/drive/commands/DriveToPositionCommand.java - Unit test:
src/test/java/xbot/edubot/linear/DriveToPositionCommandTest.java
In order to get the current distance that your robot has traveled you can do pose.getPosition() on the PoseSubsystem. This starts at 0 at the beginning of the match and will track how far the robot has moved forwards/backwards in total.
The test calls setTargetPosition() to tell your command how far to go, so you'll need to fill that method in too - right now it ignores the value it is given. To pass, your command must:
- end up within 0.2 of the target position,
- be moving at nearly zero velocity when it stops,
- and report
isFinished()as true within 300 loops.
note: It's important to understand the physical aspects of the robot being programmed.
note: The robot keeps going even after no more power is applied to the motor (because of momentum)! To stop the robot: power must be applied in reverse. This is a feature of the electric motors used in the robot. If the robot had brakes these could be applied instead.
Think through the problem yourself for a few minutes and try some attempts on your own. After you've experimented a bit, watch this video: https://www.youtube.com/watch?v=4Y7zG48uHRo
Graphical Tests!
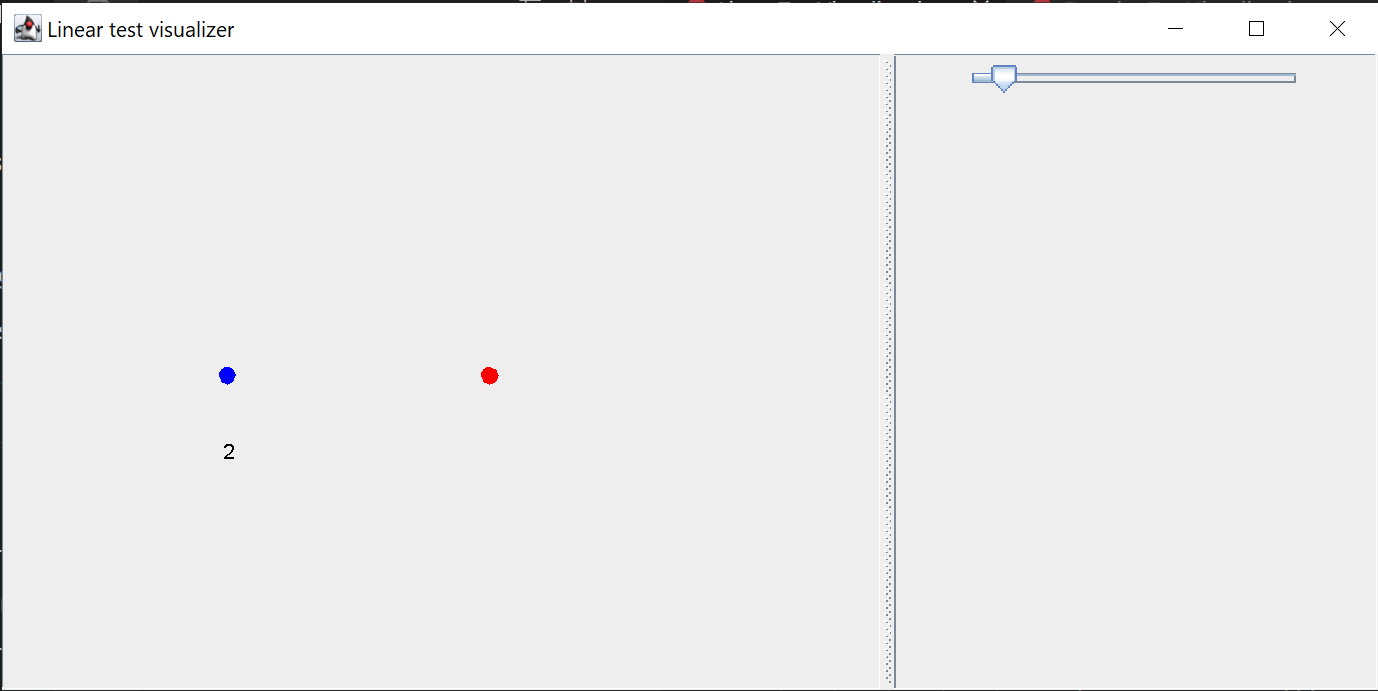
Unlike the earlier challenges, we have a nice visualizer that's easier to read/understand than reading hundreds of log statements. With this tool you can visualize the position of the virtual robot as your code is running. The blue dot is where your robot is and the red dot is your target.
To run it on IntelliJ, find the run target selector at the top of the window and select LinearTestVisualizer. Click the green Run arrow next to the drop-down menu.
When the window opens, you can use the slider on the right hand side to control the simulation speed.
Once you have a solution that achieves the target position at all, the next challenge is trying to do it as quickly as possible. Some of the fastest solutions reach their goal in ~14 loops!
To help with tuning values and speeding things up, we'll introduce the Property System next.
The Property system
It's very common on the robot that we have numbers that we want to be able to easily tune/tweak. For example:
- How long should a robot wait after moving before scoring
- How fast should the robot move
- How fast should the shooter wheel spin to launch a ball
In these cases we never know what the right number is when we're first writing our code, and then finding the right number will take a lot of trial and error later on (either in the sim or on the real robot). Instead of having to update the code, recompile and redeploy each time we want to change a value, the Property system lets us do that while the robot code is running live!
Here we'll learn how to create Properties and then you can choose to use them in your commands if you want to.
Let's say we had a value that controlled the power of the robot relative to how far away from its goal it is. I'll call the value here "p". To set this value up as a property we need to:
- Add a new instance variable to your DriveToPositionCommand class of type DoubleProperty like this
DoubleProperty pProperty; - Add a new parameter to the DriveToPositionCommand constructor function
PropertyFactory propertyFactory(we'll learn more about the Factory pattern later!) that we'll use to create the property. - Inside the body of the constructor, call
propertyFactory.setPrefix(this);
pProperty = propertyFactory.createPersistentProperty("p", 1);- The second argument 1 in this case is the default value that the property should start with, make this whatever makes sense for your properties as you make them
- Now when we want to read the value of this property in our code we can do that with
pProperty.get(), if you don't have a good place to read this value already let's just print it out in the execute() so we can see it workingSystem.out.println(pProperty.get());
Now let's try this out by running the simulator like before, but now we're also going to run another new program called Elastic (WPILib). The app name ends with the year of the WPILib version you installed, for example "Elastic (WPILib) 2026". Elastic is a program for viewing and setting these Property values.
- Inside Elastic you're going to click on "Add Widget" in the top bar.
- Find your "p" value in the list under "Preferences -> DriveToPositionCommand -> p" and then drag the p value out onto the dashboard.
Now you can try changing your p value here and the robot code should instantly read and use the new value! Once that's working, create properties for any values you want to test and tweak in your command.
Running Commands from Elastic
To test out your DriveToPositionCommand in the simulator we've set things up so you can run the command from Elastic. Do the same Add Widget you did before but this time select SmartDashboard -> DriveToPosition and drag that out. You'll now see a button you can press that will start/stop/restart your command in the simulator.
Next steps
Now is a great time to learn about making a pull request with all the great changes you've made so far so hop over to Making a PR