
Altering Tank Drive
Introduction
At this point you now have a basic robot that can be driven around with a set of 2 joysticks using tank drive. Next we're going to augment that basic drive system to support a whole range of new pieces of functionality.
Note about 'buttons'
For the commands in this list, you can just focus on implementing the command itself at first. Don’t worry about mapping the commands to buttons, the unit tests will just run your command directly. Later on you'll learn how to do the button->command mapping.
Features to add
Precision Drive:
When the driver presses a button (which invokes your command), all robot power is reduced by 50%. When they press this button again, power returns to 100%. This is useful when the driver needs to be able to make precise, small motions with the robot.
Example: User has left joystick at 100% forward. The left motors are outputting 100% forward power. User then presses the button while holding joystick forward. The left motors should now be outputting 50% power.
- Command you'll be filling in: TogglePrecisionDriveCommand - You will find it at:
src\main\java\competition\subsystems\drive\commands\TogglePrecisionDriveCommand.java - Unit test: TogglePrecisionDriveCommandTest (
src\test\java\competition\subsystems\drive\TogglePrecisionDriveCommandTest.java)
Hints:
- We want to modify the behavior of the DriveSubsystem until this method is called again. This means we'll need to use TogglePrecisionDriveCommand to save some information into the DriveSubsystem every time the command runs.
- This command only needs to do its work once, so your code goes in
initialize()rather thanexecute(). Read the comments already in the file - they walk through two different ways to structure it.
Arcade Drive (Advanced)
Arcade drive is an alternative scheme for controlling our robot. Instead of using 2 joysticks where we only use the y-axis of each, with arcade there is only one joystick and we use this for both forward/backward as well as turning. Pushing the joystick forward and backward should make the robot go forward and backward respectively, and pushing the joystick left and right should make the robot turn left and right respectively.
Example: User has joystick full forward. Robot drives forward. User has joystick full right. Robot spins in place to the right. User has the joystick full forward and full right. Robot goes forward while turning to the right.
How you achieve this is up to you, there are algorithms online you can research or come up with your own solution. The tests just verify some basic cases.
- Command: ArcadeDriveWithJoysticksCommand (
src\main\java\competition\subsystems\drive\commands\ArcadeDriveWithJoysticksCommand.java) - Unit test: ArcadeDriveTest (
src\test\java\competition\subsystems\drive\ArcadeDriveTest.java)
Hints:
- Arcade drive uses only the left stick, so read both of its axes with
operatorInterface.gamepad.getLeftVector(). The Y value is forward/backward and the X value is rotation. - In the tests, a positive X value means turn left. Turning left at full power means the left side drives backwards while the right side drives forwards.
We use Xbox and similar controllers for driving the robot:
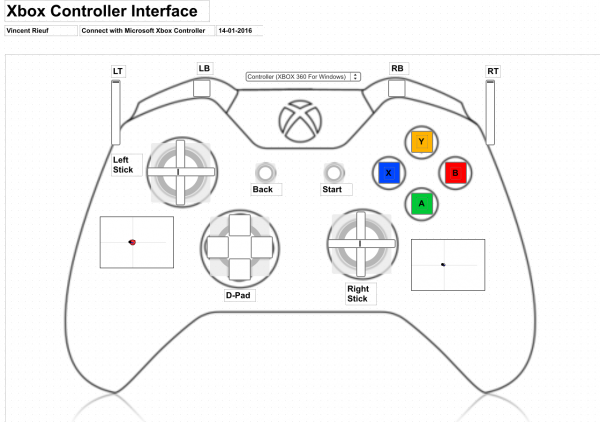
Mapping buttons
Now that we've written and tested our new commands, let's map them to some gamepad buttons so you can try them out while driving a real or simulated robot!
- File:
src\main\java\competition\operator_interface\OperatorCommandMap.java
This file is where all button to command mapping happens. Let's add a new mapping for your precision drive command:
- Add a new parameter to the setupMyCommands function
TogglePrecisionDriveCommand togglePrecisionDriveCommand- Now in the body of the function, where it says "Add new button mappings here!", let's map this command to the 'A' button of our controller:
operatorInterface.gamepad.getifAvailable(XboxButton.A).whileTrue(togglePrecisionDriveCommand);- IntelliJ will flag
TogglePrecisionDriveCommandas unknown until it is imported. Press Alt+Enter on the red text and choose the import option. (XboxButtonis already imported in this file.)
Try it out in the simulator by driving around, pressing A and seeing if the drive is slowed as expected.
Once that works, see if you can map Arcade drive to a button and test that out too!
Next Steps
Continue with the next curriculum challenge: Moving to a target position